Using brushes
Author: Salim Perchy (yamil-salim.perchy at inria dot fr)
Welcome to the 3rd tutorial of IceSL. On this entry we will create a simple 3D model and use brushes to specify different infill percentages. A brush is an internalized IceSL concept that allows the user to specify different printing parameters for different parts of a model. If you are unfamiliar with the script-based modeling philosophy of IceSL, it is strongly recommended that you look over the preceding tutorial Modeling in IceSL with the Lua editor.
- The 3D shape we’re going to work with in this tutorial is a mug. We begin by scripting the mug, therefore all code we produce will go onto the Lua Editor (left part of the IceSL main window). Open IceSL and create a new file (File –> New), answer no when prompted to save. As a good practice, we create variables that define the mug’s property, h for its height, w for its width and t for its thickness.
h = 10
w = h/2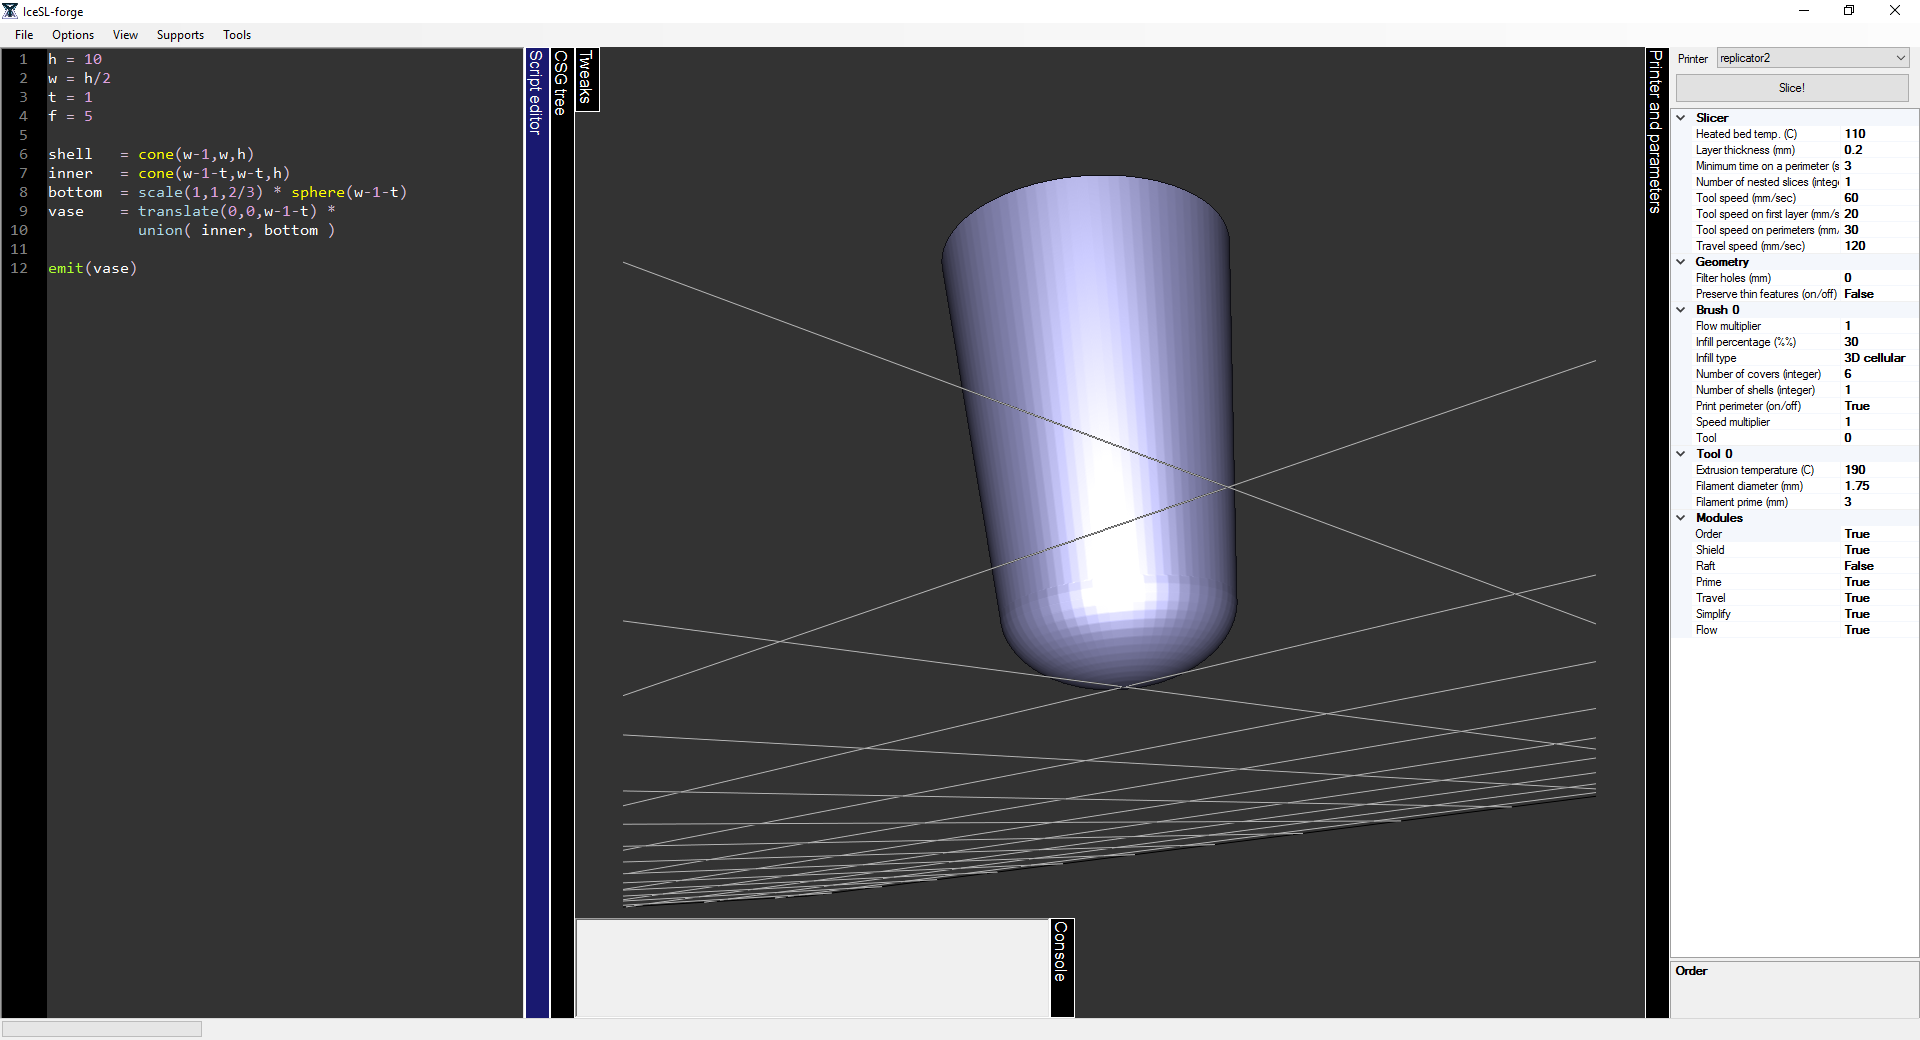
t = 1- Notice how we defined the mug’s width as half of its height. We proceed by creating the outer and inner shell of the mug. We use concentric cones to model them and separate the inner cone from the outer cone by t (the mug’s thickness). Similar to our last tutorial, a visual feedback of the script’s result can be obtained by emitting parts of the mug independently. However, at the end of the tutorial we only emit the final shape.
shell = cone(w-1,w,h)
inner = cone(w-1-t,w-t,h)- Please refer to the scripting documentation of IceSL for explanation on each parameter of the function cone. A logical next step would be to create a shape out of the difference of the outer and inner shell, however this would render a perfectly flat bottom for our mug. This may be seen as a particular wrong design because the bottom might be difficult to wash. To solve this, we give the inner cone an oval shaped bottom.
bottom  = scale(1,1,2/3) * sphere(w-1-t)
vase = translate(0,0,w-1-t) * union( inner, bottom ) |
 |
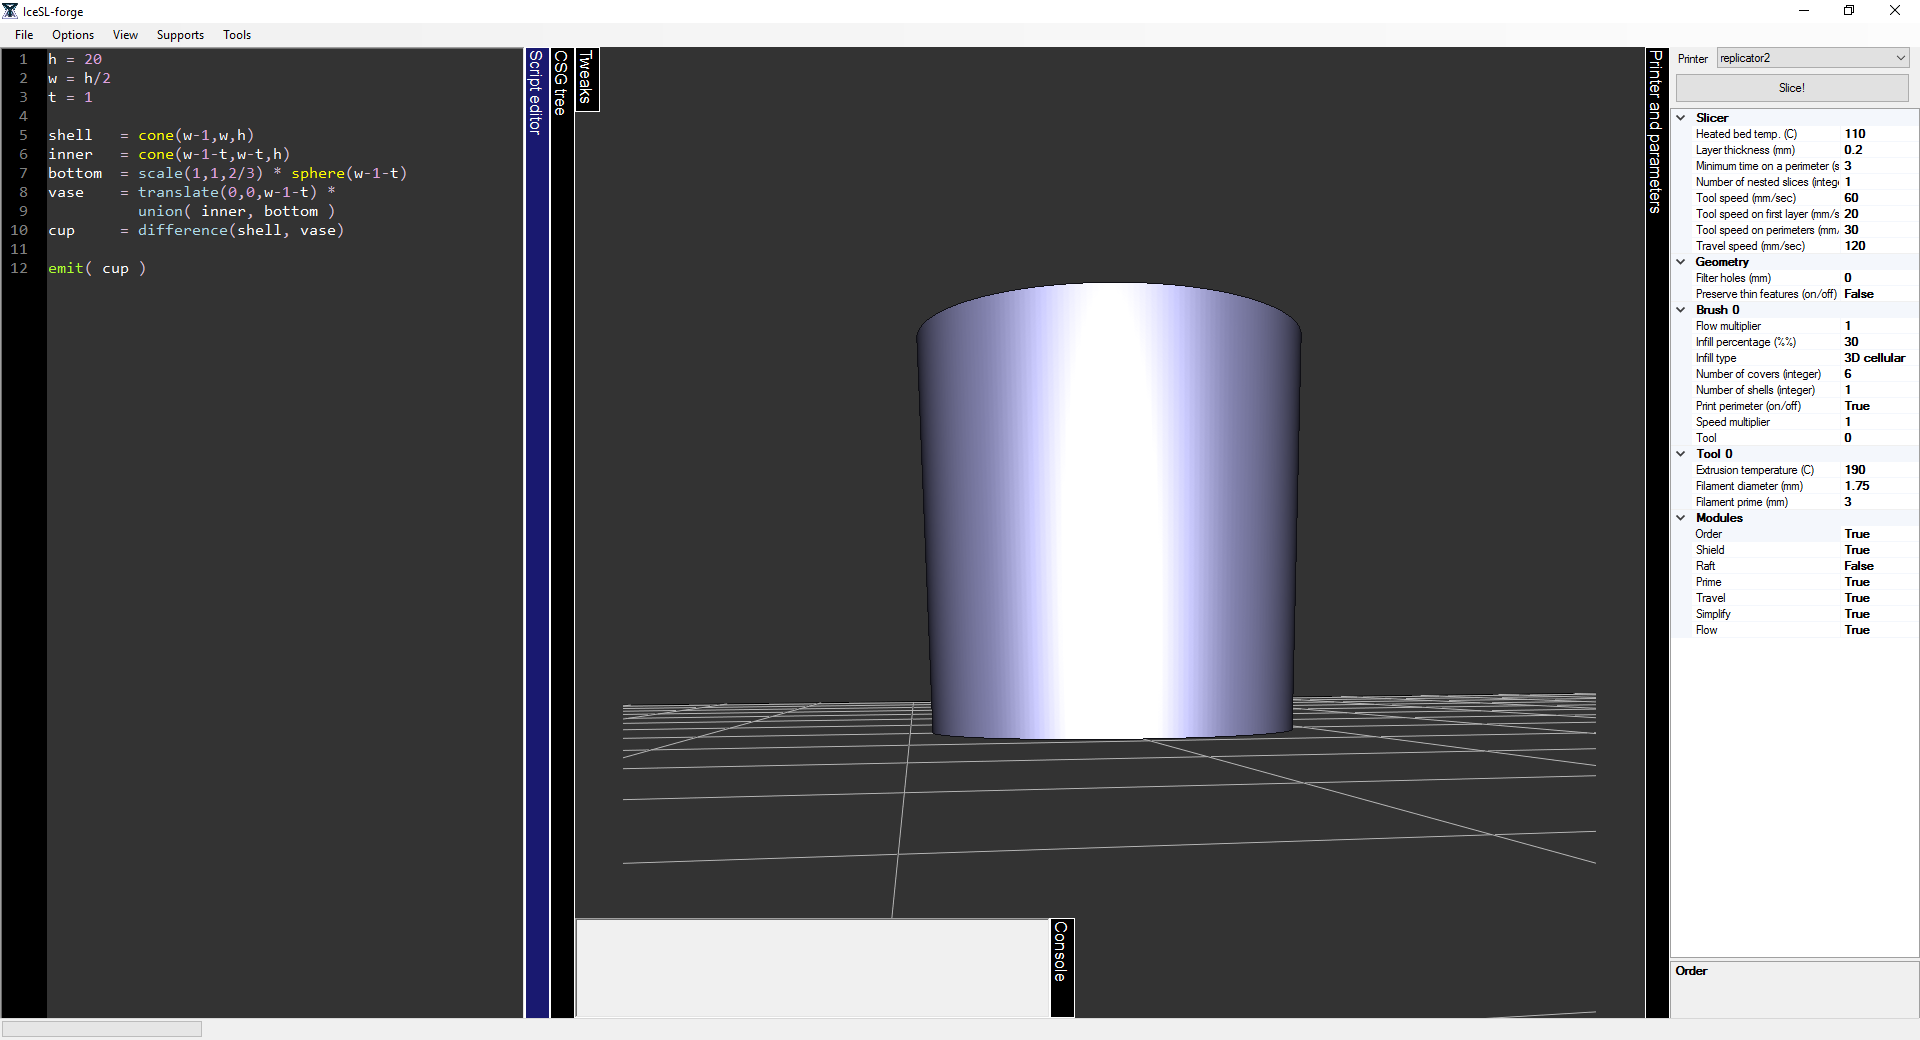
- Notice how we scaled the bottom sphere in the Z-axis by a 2/3 factor to obtain the oval shape. We now create the mug’s cup by constructing the difference of the inner and outer shell.
cup = difference(shell, vase)- Sometimes we need to have a better visual feedback than the usual camera rotation can allow. One technique we can use is to render a dissection of our intended shape. In order to perform this dissection,we create a sufficiently large cube, translate it to occupy the half of the shape we want to dissect and render the shape’s difference with the cube.
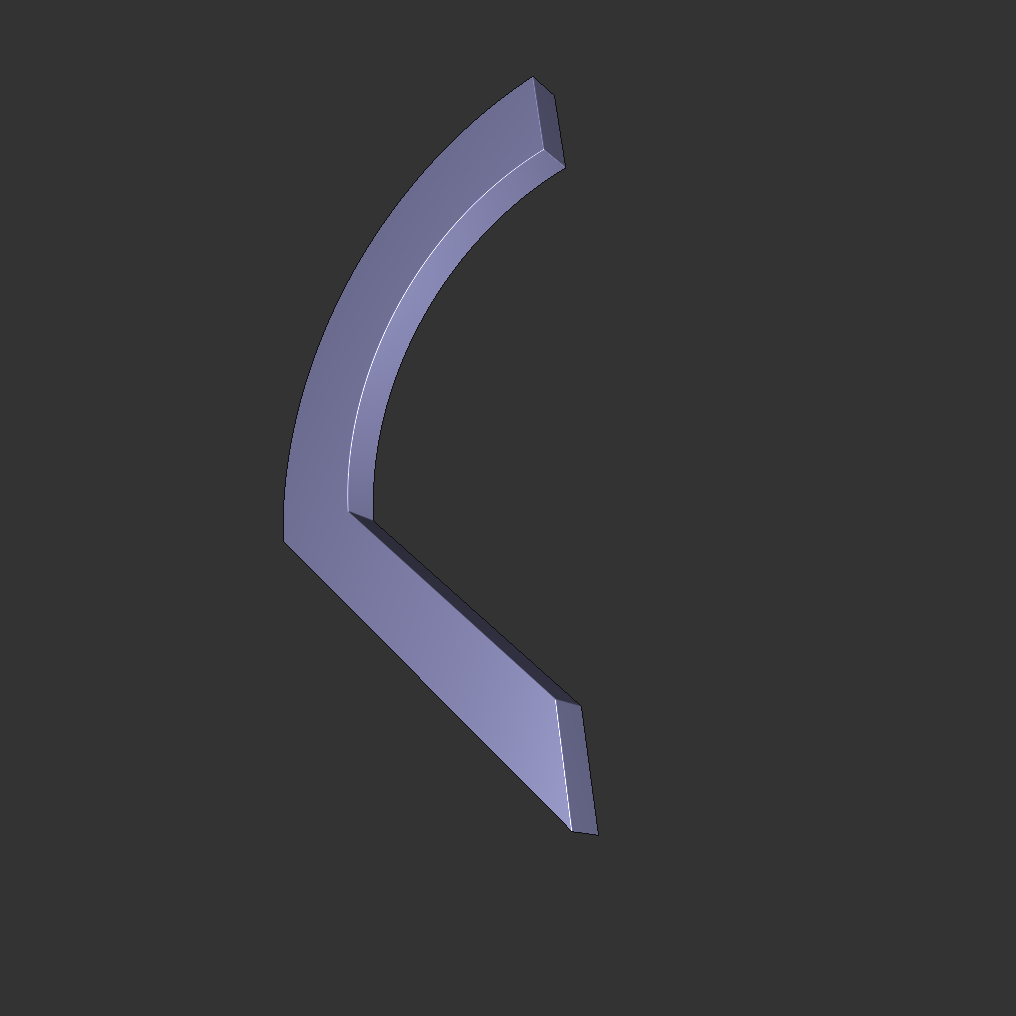
- We’re now only missing the handle to our mug. There’s a handful of shape options for mug handles, nonetheless we take a geometrical approach. We calculate the difference of two spheres, one inside another, cut the result by the front and the back with cubes and scale it proportionately to the mug with a slight oval shape in the z-axis.
ring    = difference( sphere(1), sphere(2/3) )
cuts    = union( translate(0,-1-t/4,0) * ccube(2),
                 translate(0, 1+t/4,0) * ccube(2) )
handle  = scale(w/3,w/2,w/2) *
difference( ring, cuts )

emit( handle )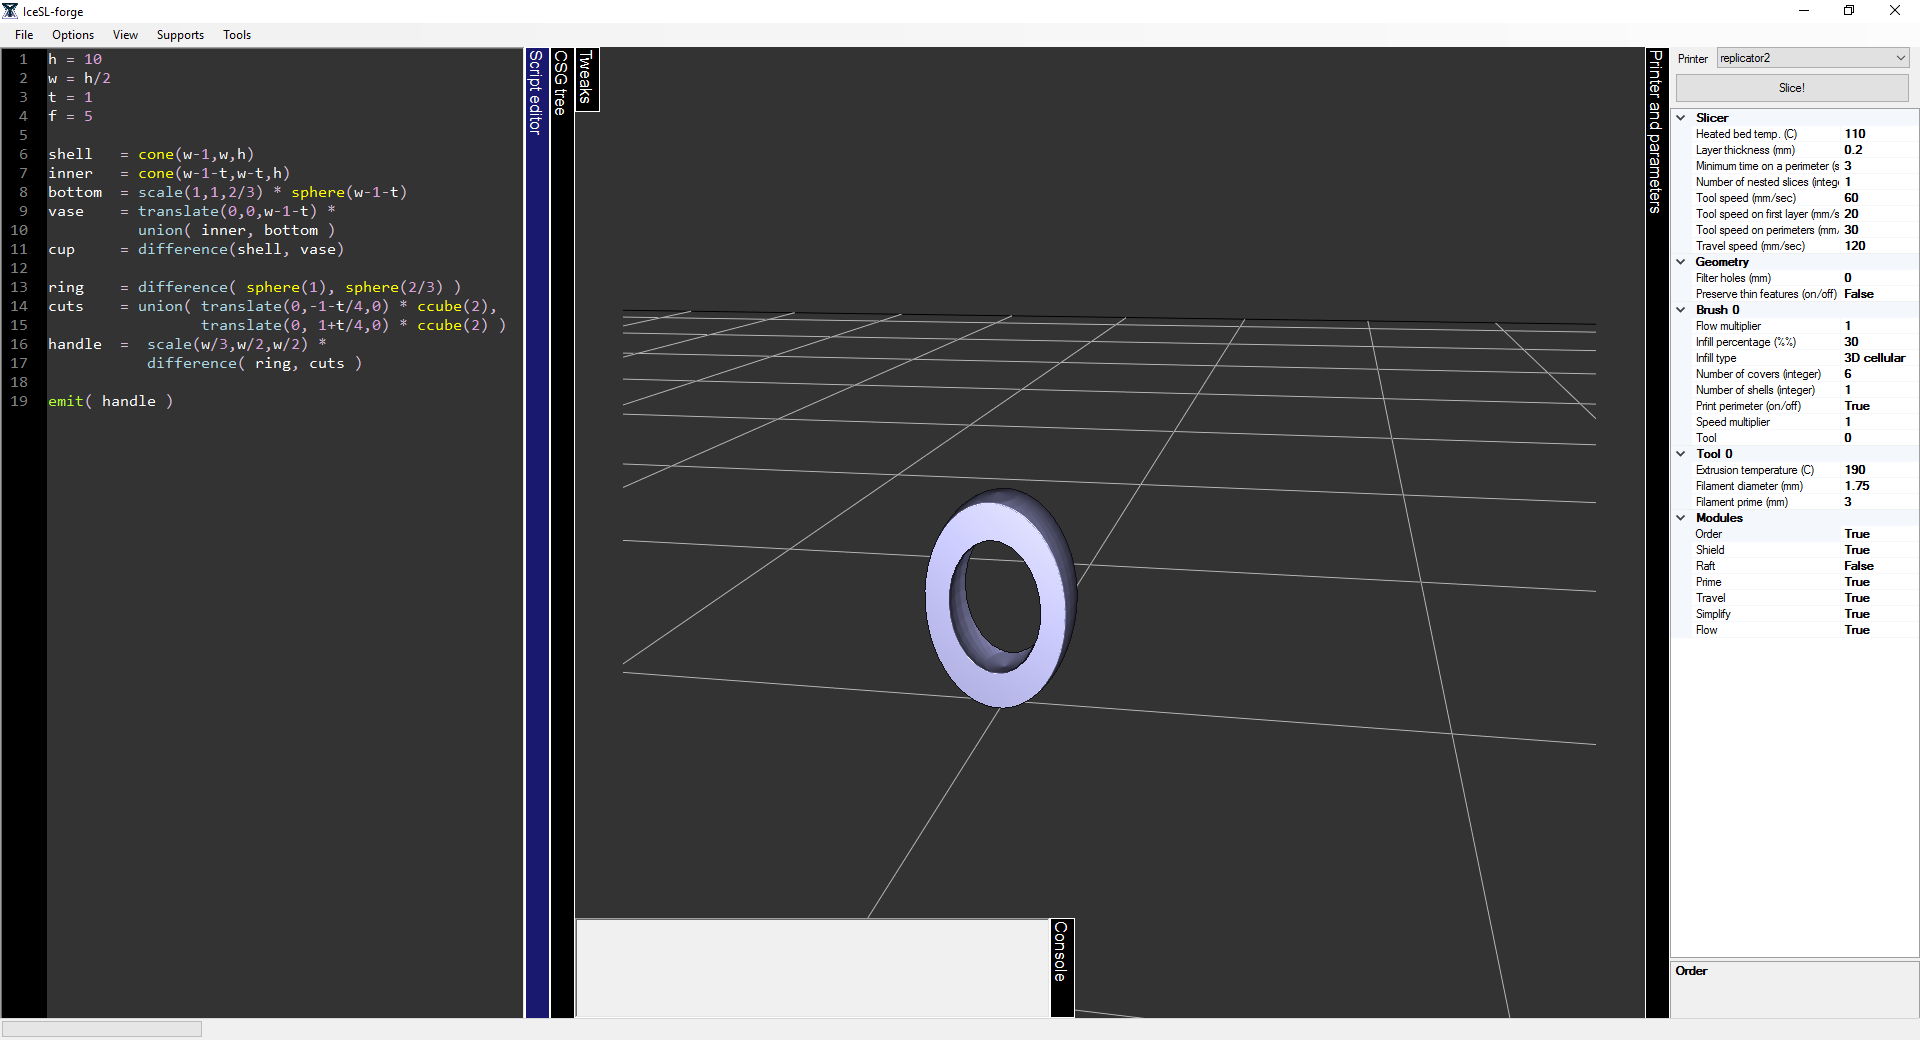
- We rotate and add a translation to the handle to better position it with respect to our mug. Additionally, we need to subtract the inner shell to the handle, this way the handle won’t bulge inside the mug. Next, we join the cup with the handle and render it with transparency to help us appreciatebetter the final result.
handle      = rotate(-30,Y) * scale(w/3,w/2,w/2) *
              difference( ring, cuts )
dissection  = translate(0,-h,0) * ccube(2*h)

emit(difference(union(cup, handle),dissection))
- The handle is a very sensitive part of the mug. Because of this, we might want to endow it with different properties when printing it. For this, IceSL features a set of brushes (128 to be exact) that can be used to independently emit different parts of the model. Their use is pretty straightforward in our script; we emit on brush 0 the cup and on brush 1 the handle. The parts are rendered in different colors to help us differentiate them easily.
emit( cup, 0 )
emit( handle,1 )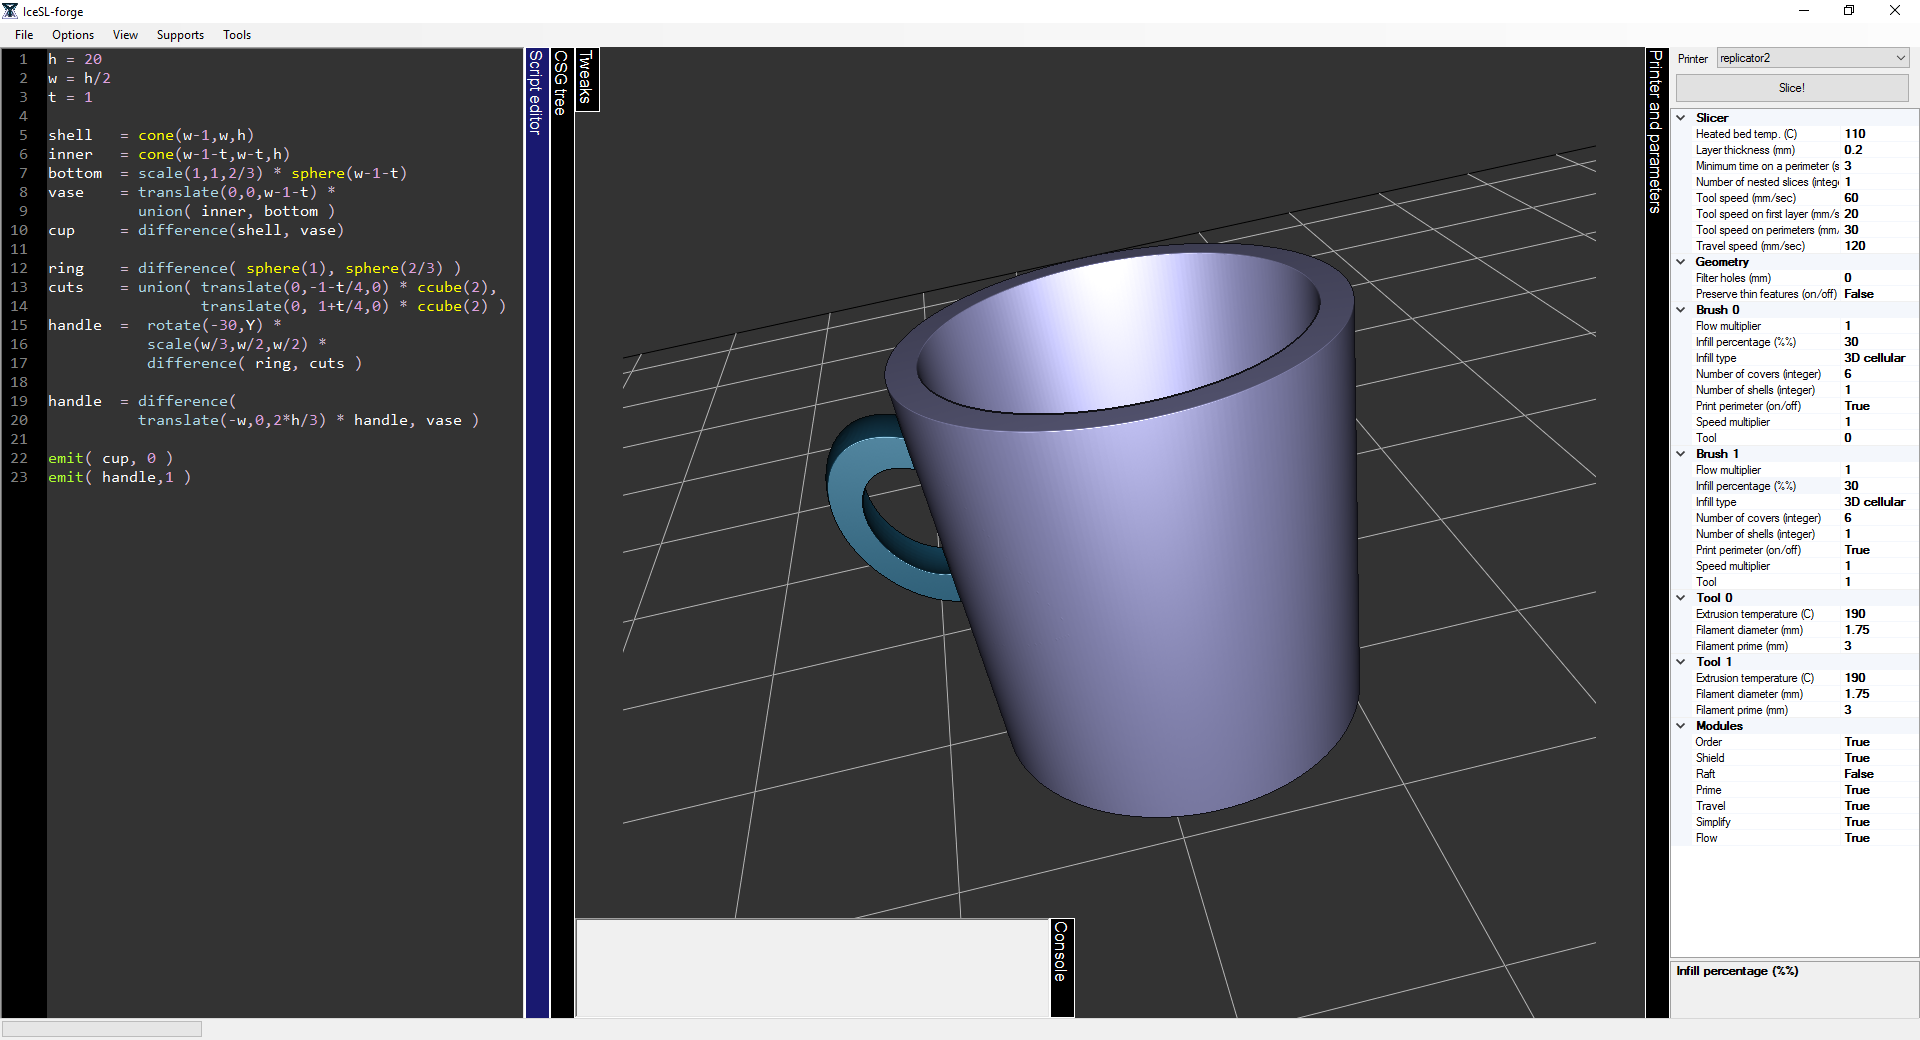
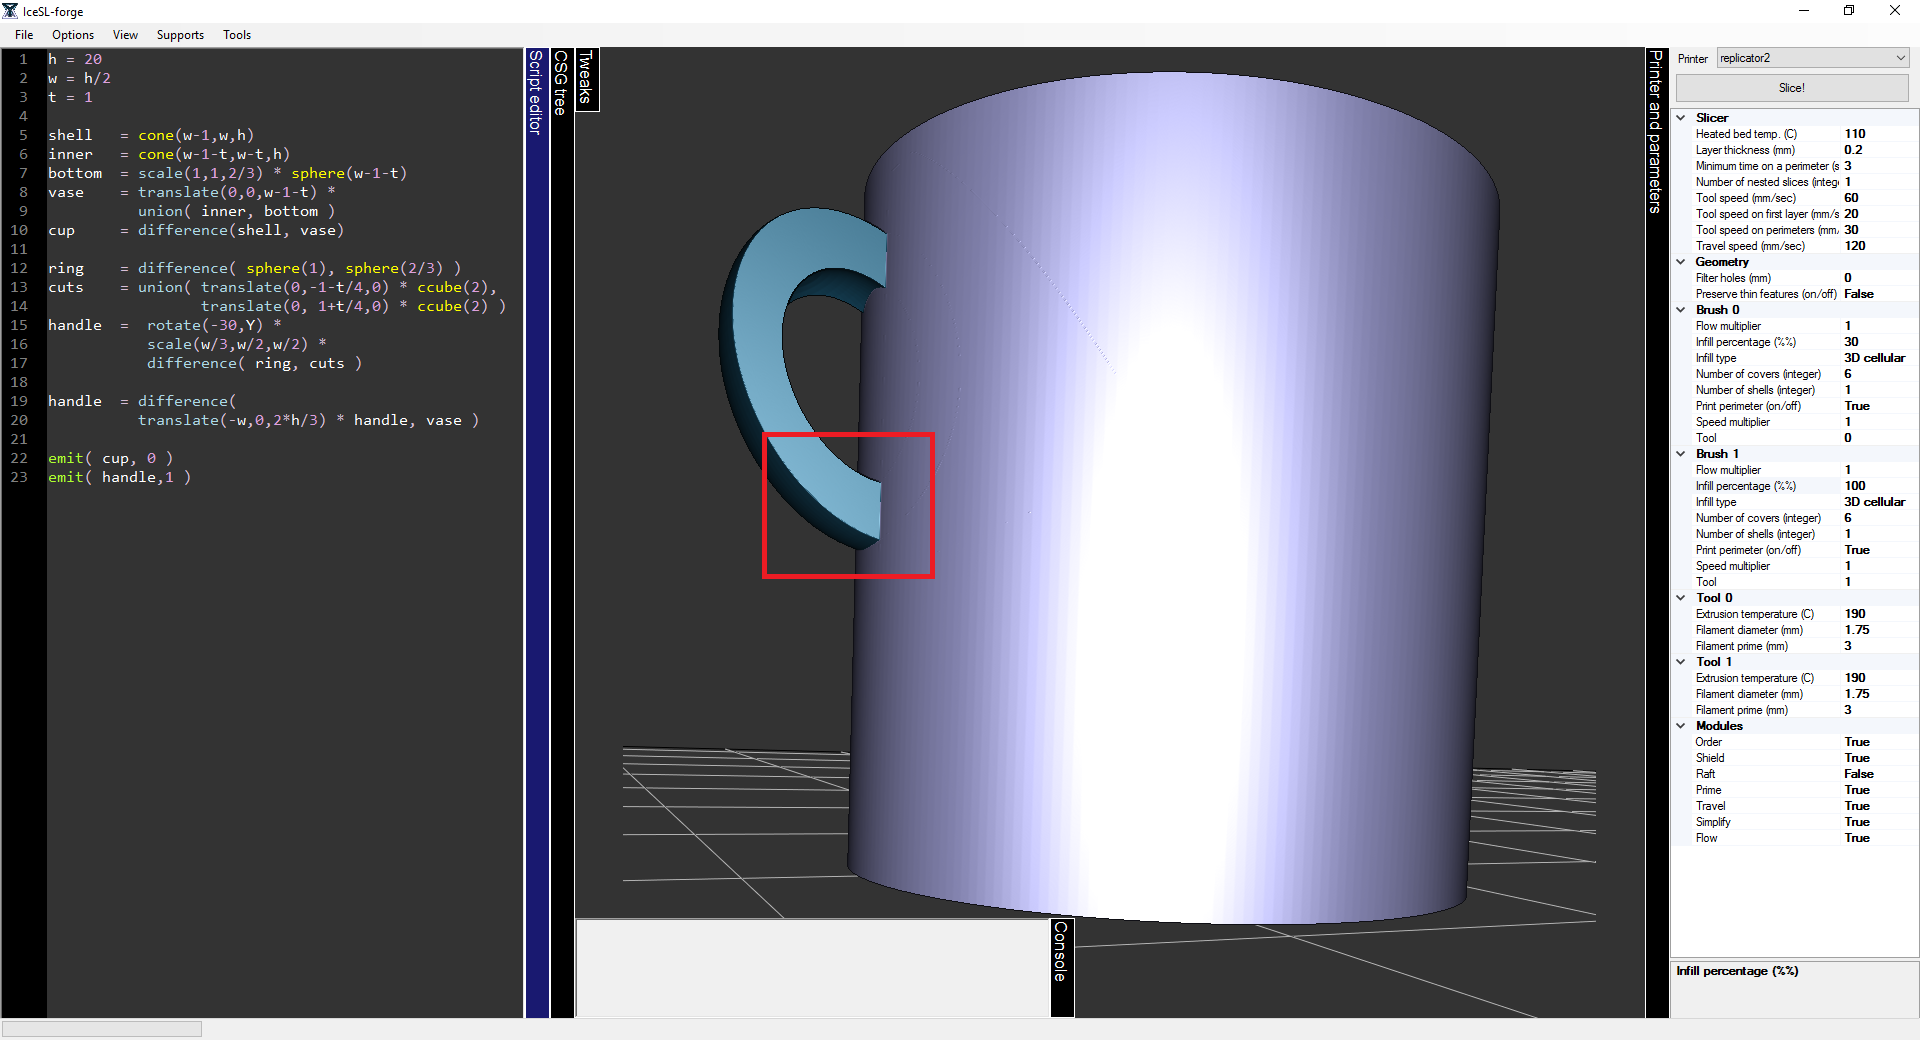
- We can notice now that on the printing parameters (right side of the main IceSL window) there’s two sets of printing parameters, one for each brush. As mentioned above, the handle is a sensitive part because it has to support all the cup’s weight when handling the mug. Subsequently, we set the infill parameter of the handle’s brush to 100%, this way we ensure the handle is hard enough. Additionally we set the cup’s brush infill parameter to 30% as this part does not require much density.
- We’ve now reached the end of the tutorial, what’s left is to select your printer, slice the model and save the gcode file, oh, and keep the coffee away from it… In all seriousness, we advice not to drink from it! ;) The complete code to the mug script can be downloaded here.
Exercise!
- Try to shape a more stylistic handle. You can use for example cylinders or you can model an edgy shape that can be smoothed out with the convex_hull function (see the scripting documentation). TIP: Maybe you can try modeling the handle shown bellow.